
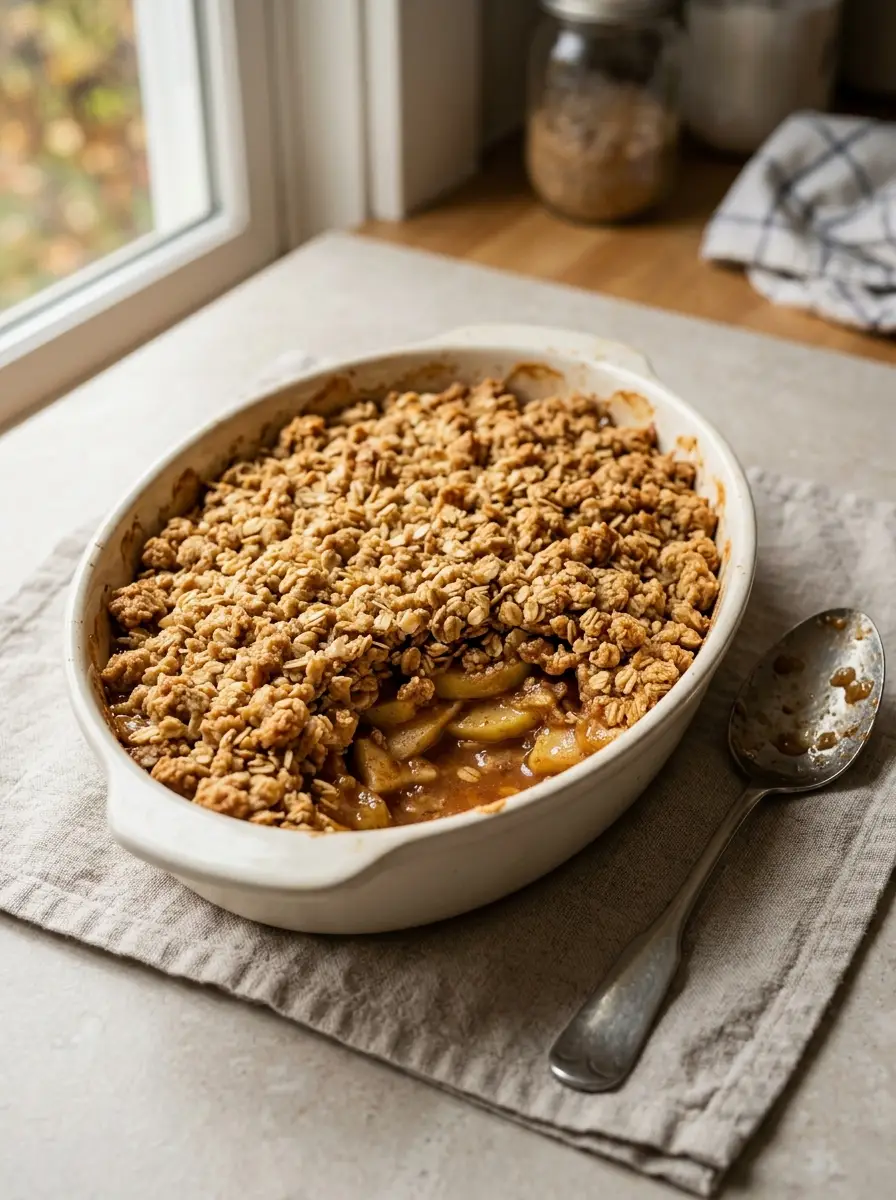
Classic Apple Crisp layers tender cinnamon-coated apples beneath a buttery oat crumble topping that turns golden and crisp in the oven. It has the warmth of a homemade apple pie without requiring pastry dough, rolling, chilling, or careful shaping, which makes it one of the most practical apple desserts for home baking.
This easy apple crisp is especially useful when you want a comforting dessert with familiar ingredients and a straightforward method. Fresh apples provide a juicy, lightly tart filling, while brown sugar, rolled oats, flour, cinnamon, and cold butter create a crumbly topping that contrasts with the softened fruit underneath.
Why Classic Apple Crisp Is Such a Reliable Fall Dessert
Apple crisp works because the filling and topping perform very different jobs. The apples soften and release juice as they bake, while the topping becomes dry, crumbly, and golden. A spoonful of the finished dessert contains both tender fruit and crisp oat clusters, giving the dish more texture than a simple baked apple filling.
It is also forgiving. A pie crust requires careful handling to stay flaky, but an oat crumble topping is mixed until rough clumps form and then scattered over the fruit. An uneven surface is not a problem; in fact, irregular clusters create some of the best crisp edges.
The recipe is flexible enough for different baking apples, provided they hold their shape reasonably well. Using a mixture of tart and sweet varieties can create a more balanced filling because one type contributes acidity while another brings natural sweetness.
This cinnamon apple dessert also requires only a baking dish and two mixing bowls. The apples do not need to be precooked, and the topping can be assembled while the oven heats.
For fall gatherings, the crisp can be assembled before dinner and baked while the main meal is being served. The resting period after baking gives the fruit juices time to settle, so the timing works naturally with a family meal.
Choose Apples That Stay Tender Without Becoming Mushy
The apples are the main ingredient, so their variety has a noticeable effect on the finished dessert. Firm baking apples are preferable to very soft varieties because they need enough structure to withstand an extended period in the oven.
Granny Smith apples bring a pronounced tart flavor and hold their shape well. Honeycrisp apples are sweeter and remain pleasantly firm. Combining the two creates a filling with both sweetness and acidity.
Other firm baking apples can also work. The important point is to avoid fruit that is already soft or mealy before baking.
Cut the apples into pieces of similar thickness. Uneven slices can produce a filling where thin pieces dissolve while thicker pieces remain firm.
Peeling the apples gives the crisp a softer, more consistent texture. Leaving some peel can work when you prefer additional color and a slightly firmer bite, but a completely peeled filling is usually easier to scoop.
The Principal Ingredients Behind the Crisp
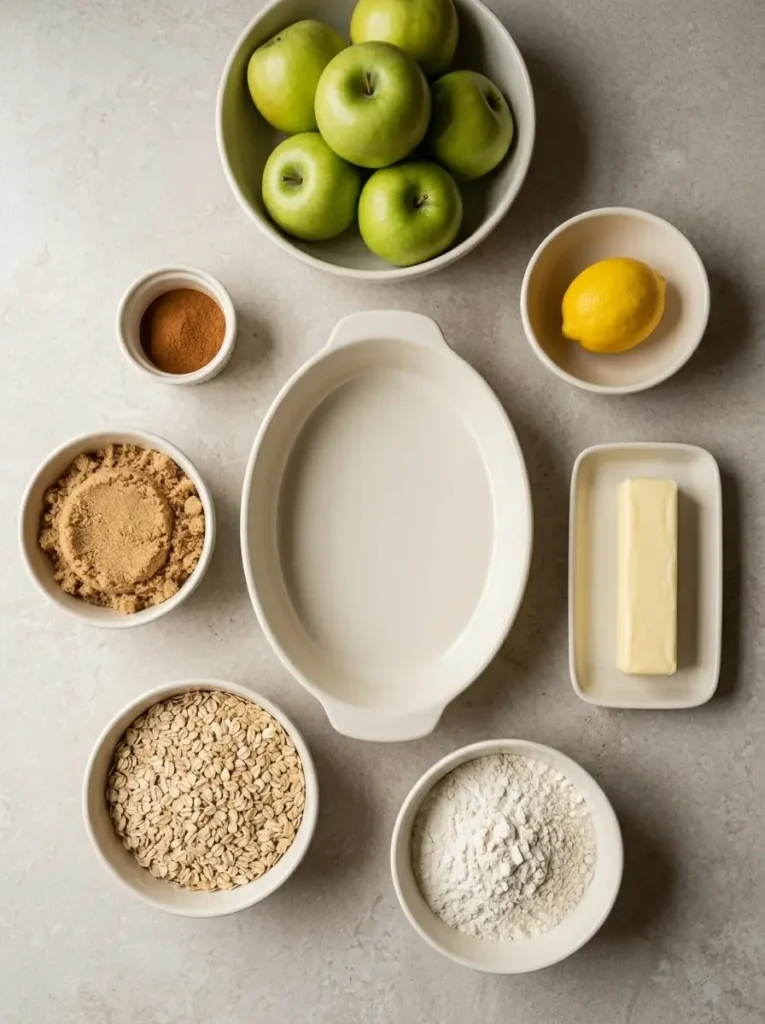
Whole baking apples
Fresh apples provide sweetness, acidity, moisture, and most of the volume. Their juices combine with sugar and flour in the oven to create a lightly thickened fruit filling.
Fresh lemon
Lemon juice adds acidity and helps keep the apple flavor bright. It is particularly useful when sweeter apple varieties are included.
The lemon should support the fruit rather than make the dessert taste distinctly citrusy.
Rolled oats
Rolled oats are responsible for much of the topping’s texture. They remain more defined than flour during baking and create crisp edges throughout the crumble.
This is what distinguishes an oat crumble topping from a plain flour-and-butter streusel. Old-fashioned rolled oats produce a particularly noticeable texture.
Brown sugar
Brown sugar contributes sweetness and a subtle caramel-like flavor to the topping. Its moisture also helps the crumble form irregular clusters instead of remaining completely sandy.
All-purpose flour
Flour appears in both parts of the dessert. A small amount helps control the juice released by the apples, while more flour gives the topping enough structure to crisp.
Cold butter
Butter creates richness and helps the oat mixture form clusters. Cold butter worked into the dry ingredients produces an irregular crumb rather than a smooth paste.
The topping should contain a mixture of smaller crumbs and larger pieces. Those differences create more texture after baking.
Cinnamon
Cinnamon is the defining spice in this fall fruit recipe. It complements the apples without requiring a long list of additional spices.
A modest amount can season both the filling and topping so the flavor is present throughout the dessert rather than concentrated in one layer.
Build an Apple Filling That Is Juicy but Not Watery
Begin by preparing the apples shortly before assembling the dessert. Once peeled and sliced, they begin releasing moisture and slowly oxidizing, so there is little benefit to leaving them exposed for a long period.
Place the prepared apples in a large bowl and add lemon juice, sugar, flour, and cinnamon. Toss gently until the fruit has a thin, even coating.
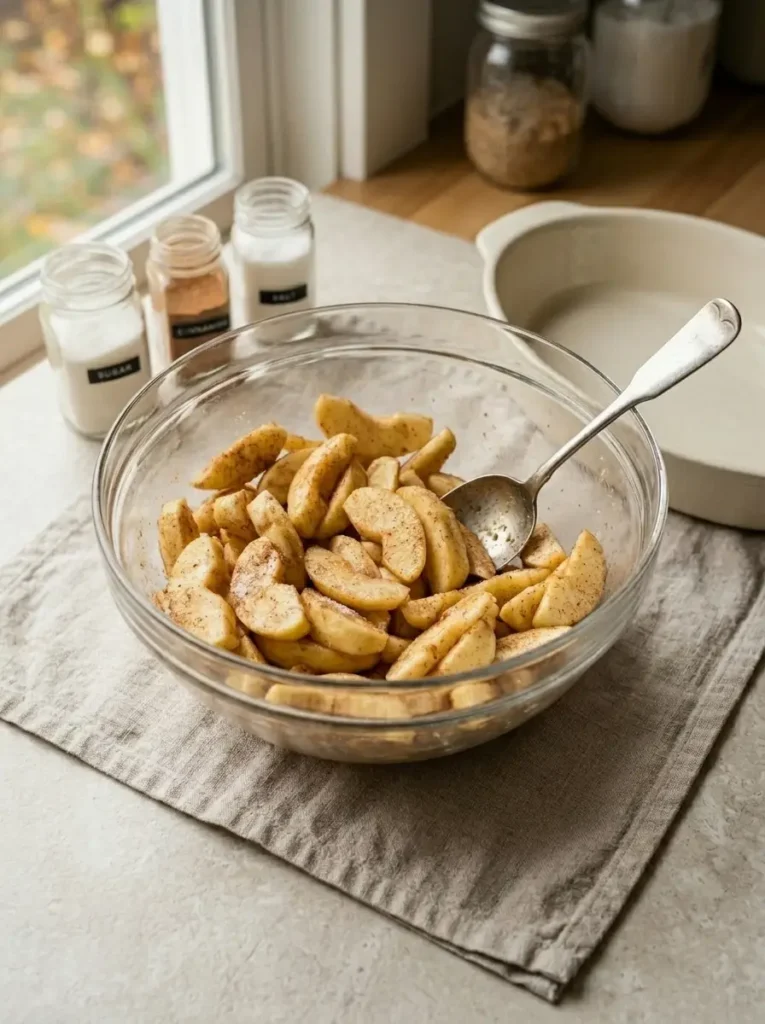
The flour may initially look slightly dusty on some pieces. As the apples begin releasing a little juice, the dry ingredients dissolve into the coating.
Transfer the mixture to the prepared baking dish and arrange it in a relatively even layer. Avoid pressing the apples firmly into the pan. Small spaces allow hot air and bubbling juices to move around the fruit.
The filling should not contain a large amount of liquid before baking. Most of the juice develops in the oven as the apple cells soften.
Make a Cinnamon Oat Topping With Plenty of Crisp Clusters
Combine the flour, rolled oats, brown sugar, cinnamon, and salt in a separate mixing bowl.
Mix the dry ingredients thoroughly before adding the butter. This prevents concentrated pockets of cinnamon or salt in the finished topping.
Add cold butter and work it into the mixture with your fingertips or a pastry blender. Stop when the topping contains uneven crumbs and clusters that hold together when squeezed.
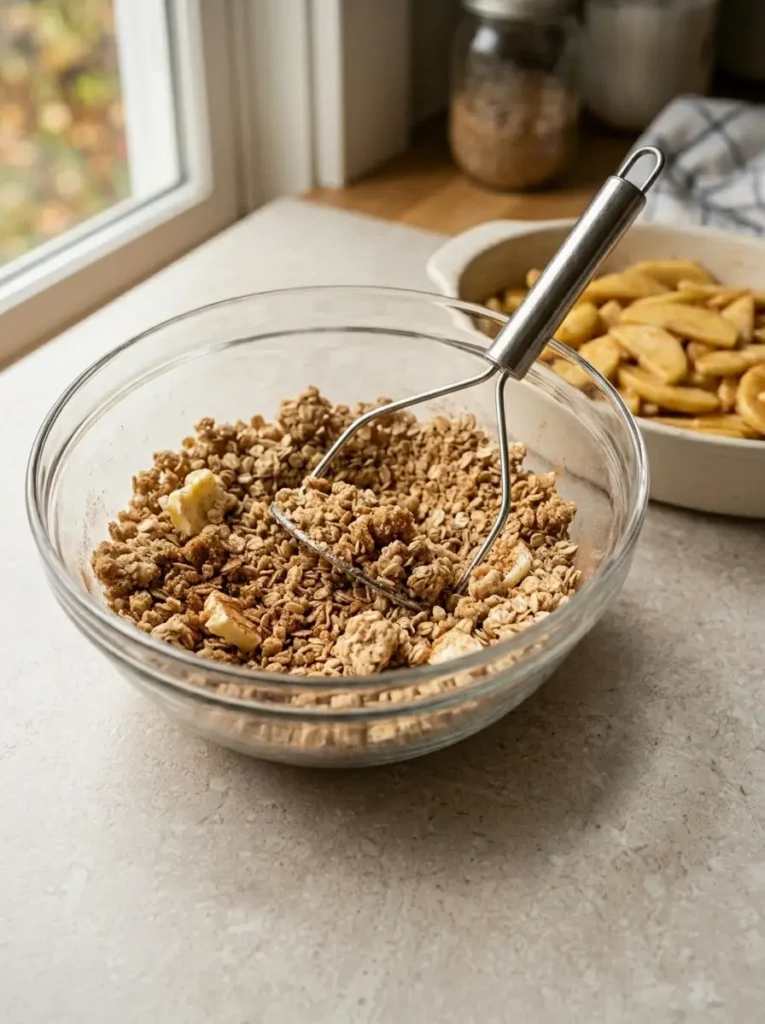
Do not continue mixing until the topping becomes smooth. A smooth dough forms a more solid crust and loses the characteristic crumbly texture expected from apple crisp.
Scatter the topping over the apples without pressing it down. Cover most of the fruit, but allow natural gaps and irregular clumps.
Those thicker clumps become especially crisp along their exposed edges, while the finer crumbs absorb a little apple juice and connect the topping to the filling.
How to Bake Classic Apple Crisp Evenly
Preheat the oven completely before putting the baking dish inside. The butter in the topping should begin melting in a properly heated oven rather than sitting for an extended period at a low temperature.
Bake the crisp until three visual signs appear together: the topping is golden, the fruit juices are bubbling around the edges, and the apples can be pierced easily with a knife.
Color alone is not enough. The oat topping may brown before very thick apple slices are fully tender, which is why checking the fruit itself is useful.
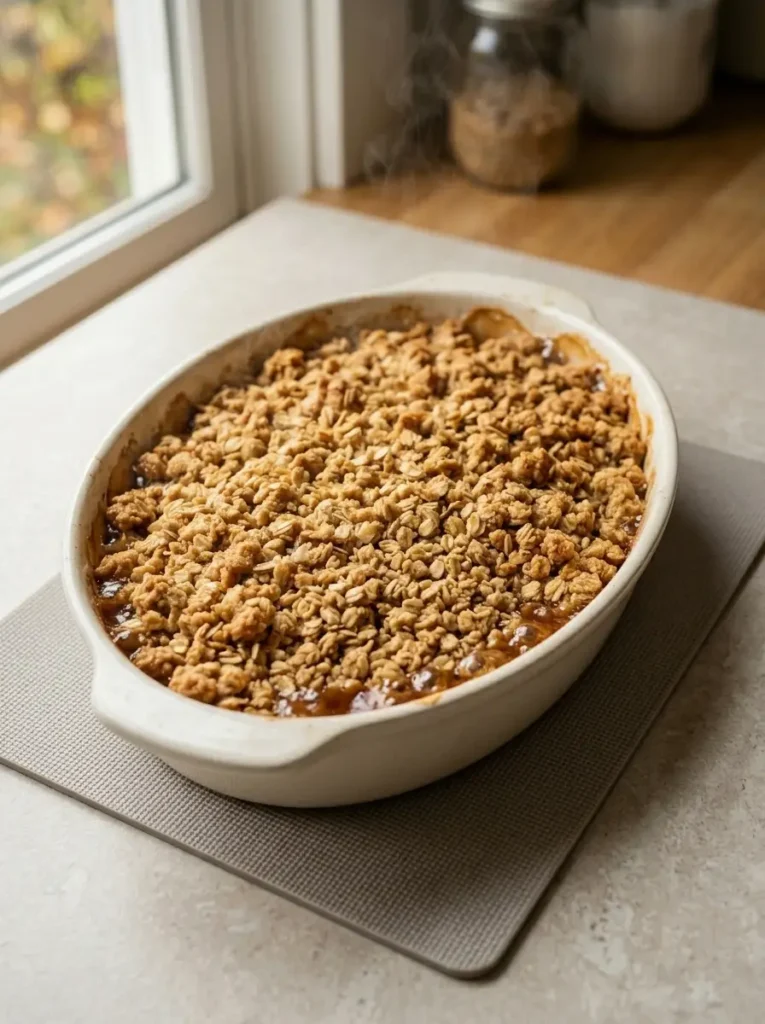
If the topping becomes deeply golden before the apples are ready, loosely cover the upper surface with foil for the remaining baking time.
Do not remove the dessert from the oven as soon as the first bubble appears. The filling needs enough heat for the flour and apple juices to thicken together.
Let the Crisp Rest Before Serving
A freshly baked crisp is extremely hot and the filling is at its loosest. Allowing it to rest gives the juices time to settle and slightly thicken.
The oat topping also becomes crisper as steam escapes from the surface. Serving the dessert immediately from the oven can make the topping seem softer than it will be after a short rest.
For a warm dessert, let the crisp stand until it is comfortable to spoon but still noticeably warm.
For cleaner portions, allow a longer cooling period. Apple crisp is not intended to cut into perfectly firm squares, but the filling becomes much easier to serve after resting.
How to Keep the Oat Crumble Topping Crisp
Use cold butter
Cold butter encourages distinct crumbs and clusters. Very soft butter can make the topping dense and greasy before it enters the oven.
Do not overmix
Stop mixing as soon as the topping holds together when squeezed. Continuing beyond that stage can create a dough rather than a crumble.
Do not compress the topping
Scatter it loosely over the apples. Pressing it flat limits the amount of exposed surface that can crisp.
Use a wide baking dish
A broad surface creates a better ratio of topping to fruit. A very deep dish produces less exposed crumble and may require longer baking.
Let steam escape after baking
Do not immediately cover a hot crisp. Trapped steam settles back onto the topping and quickly softens it.
Classic Apple Crisp
Ingredients
Apple Filling
- 6 medium firm baking apples
- 1 tablespoon fresh lemon juice
- 1/2 cup granulated sugar
- 2 tablespoons all-purpose flour
- 1 teaspoon ground cinnamon
- 1/4 teaspoon kosher salt
Cinnamon Oat Topping
- 1 1/4 cups all-purpose flour
- 1/2 cup old-fashioned rolled oats
- 1/2 cup packed light brown sugar
- 1/2 teaspoon ground cinnamon
- 1/4 teaspoon kosher salt
- 12 tablespoons cold unsalted butter cut into small cubes
Instructions
Prepare the oven and baking dish:
- Preheat the oven to 350°F. Lightly butter a 2-quart baking dish and set it aside.
Prepare the apple filling:
- Peel and core the apples, then cut them into even wedges or slices. Place them in a large mixing bowl and add the lemon juice, granulated sugar, flour, cinnamon, and salt. Toss gently until evenly coated.
Fill the baking dish:
- Transfer the apple mixture to the prepared baking dish and spread it into an even layer without pressing the fruit firmly down.
Make the cinnamon oat topping:
- Combine the flour, rolled oats, brown sugar, cinnamon, and salt in a medium bowl. Add the cold butter and work it into the dry ingredients until coarse crumbs and larger clumps form.
Top and bake the crisp:
- Scatter the oat mixture loosely and evenly over the apples. Bake for about 45 minutes, or until the topping is golden, the fruit juices bubble around the edges, and the apples are tender when pierced with a knife.
Rest before serving:
- Remove the baking dish from the oven and let the crisp rest for at least 15 minutes. Serve warm or at room temperature.
Keep the butter cold and avoid pressing the crumble onto the apples for a crisper topping.
Serving Ideas for a Cinnamon Apple Dessert
Classic Apple Crisp is complete enough to serve without any topping. A warm spoonful allows the cinnamon apples and buttery oats to remain the dominant flavors.
Vanilla ice cream is the most familiar addition. The cold ice cream softens against the warm filling and creates a creamy contrast to the crisp oat topping.
Lightly whipped cream provides a less frozen alternative and works particularly well after the crisp has cooled closer to room temperature.
For breakfast-style leftovers, a small spoonful of plain Greek yogurt can provide a tangy contrast, although the dish should still be treated primarily as a dessert.
Keep additional toppings simple. Caramel sauce, nuts, whipped cream, and ice cream can all work individually, but adding several rich toppings at once can overpower the apples.
Make-Ahead Options for Fall Gatherings
The apple filling and crumble can be prepared separately several hours before baking.
Keep the sliced apple mixture covered in the refrigerator. Store the oat topping in a separate chilled container so the butter remains firm.
Shortly before baking, transfer the apples to the baking dish and scatter the topping over them.
The complete unbaked crisp can also be assembled ahead for a shorter period and refrigerated. A chilled baking dish may need additional oven time because the filling starts at a lower temperature.
For the best topping texture, avoid storing the assembled raw crisp overnight when the crumble is in direct contact with very juicy apples. The oats and flour can begin absorbing moisture before baking.
Simple Variations
Mix two apple varieties
Combining tart and sweet baking apples creates a more complex filling and can reduce the need to adjust the sugar significantly.
Add a small amount of nutmeg
A pinch of nutmeg can deepen the warm spice flavor. Keep it secondary to the cinnamon so the dessert retains its classic character.
Add chopped pecans or walnuts
Nuts can be folded into the oat topping for additional crunch. Keep the amount moderate so oats remain the main topping texture.
Use less sugar with very sweet apples
When the apples taste particularly sweet before baking, slightly reduce the filling sugar rather than making the finished dessert excessively sweet.
Add a little apple cider
A small splash of apple cider can reinforce the apple flavor, but avoid adding too much liquid. The fresh apples already release considerable juice while baking.
Storage and Reheating
Allow leftover apple crisp to cool before covering it. Refrigerate the dessert in its baking dish or transfer individual portions to airtight containers.
The topping gradually softens during refrigeration because it absorbs moisture from the apple filling. This is normal and does not mean the dessert has failed.
Reheat it in the oven
Oven reheating gives the topping the best opportunity to become crisp again. Place the desired portion in an oven-safe dish and heat until the fruit is warm and the crumble feels dry on the surface.
Reheat it in the microwave
The microwave is faster for individual portions, but it produces a softer topping. Heat in short intervals so the apple filling does not become excessively hot.
Can apple crisp be frozen?
Yes. Cool the baked crisp completely, wrap it carefully, and freeze it. Thaw in the refrigerator before reheating.
For the freshest texture, an unbaked crisp can also be frozen in a freezer-safe baking dish and baked later, although the cooking time will need to be adjusted for the colder starting temperature.
Frequently Asked Questions
What are the best apples for Classic Apple Crisp?
Firm baking apples such as Granny Smith and Honeycrisp work particularly well. Using one tart and one sweeter variety creates a balanced filling that remains structured after baking.
Why is my apple crisp topping not crispy?
The butter may have been too soft, the topping may have been overmixed or pressed down, or the dessert may have been covered while still hot. Loose crumbs, cold butter, and exposed surface area all help the topping crisp.
Can I prepare this easy apple crisp in advance?
Yes. Prepare the apple filling and oat crumble topping separately and refrigerate them, then assemble shortly before baking. This helps keep the topping dry until it enters the oven.
How do I know when the apple crisp is finished?
The crumble should be golden brown, the filling should bubble around the edges, and a knife should slide easily into the apples. Checking all three signs is more dependable than relying only on baking time.